High ceilings can make a room feel generous, dramatic, and surprisingly difficult to illuminate. Light often disappears above eye level, leaving floors dim while exposed fixtures create harsh glare. This guide to Lighting for High Ceiling Spaces presents ten practical tips for achieving balanced, comfortable brightness.
The process begins with the room’s purpose, ceiling height, surface colors, and existing daylight. A 20-foot ceiling may need high-output pendants, adjustable track heads, or carefully aimed linear fixtures. However, more lumens do not automatically create better lighting. Poorly shielded LEDs can shine into people’s eyes and make a polished floor look uncomfortably bright. Layered lighting usually performs better, combining ambient, task, and accent sources. It also gives users more control throughout the day.
Details matter.
Experienced designers consider beam angles, color temperature, dimming compatibility, and maintenance access before selecting equipment. A narrow beam may highlight a tall artwork, while a wider beam can soften a broad seating area. Warm white light often suits hospitality and residential settings, but offices may require different visual conditions. Local electrical codes and manufacturer instructions should guide installation, and qualified professionals should handle elevated or complex work. Safety cannot be treated as decoration.
Some recommendations may need adjustment. A dramatic chandelier might suit a lobby but overwhelm a compact dining room. Likewise, smart controls can improve efficiency, yet complicated systems may frustrate occupants. These ten tips focus on useful decisions, not perfect formulas. Walk through the space at night, inspect shadows from several angles, and revise the plan when the room disagrees.
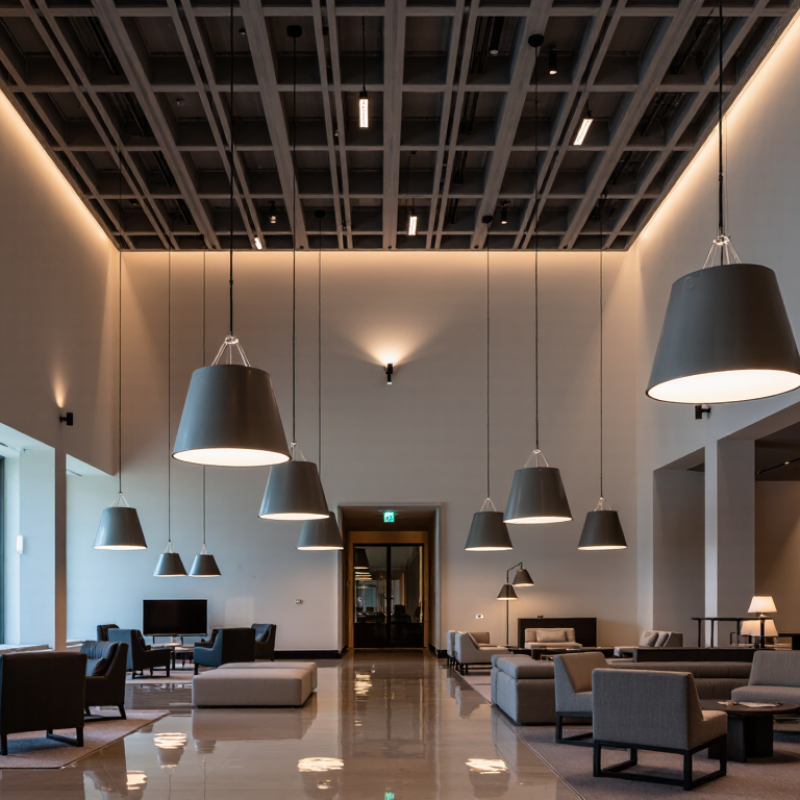
High ceilings change how light travels and how people experience a room. Light must travel farther, so brightness at floor level can fall quickly. In practice, I begin by measuring ceiling height, room dimensions, surface colors, and daily activities. A dark ceiling absorbs light, while pale walls help distribute it. Use layered lighting: ambient fixtures for general brightness, task lighting for work surfaces, and accent lighting for beams, artwork, or architectural details.
Choose beam angles according to ceiling height and target areas. Narrow beams can highlight a table, but they may create harsh bright spots. Wider beams usually provide softer coverage. For pendant fixtures, check the suspension height from several viewpoints. Avoid placing lights directly above screens or glossy floors, where glare becomes distracting. Dimmers are valuable. They allow the room to change from active daytime use to a calmer evening setting. I once relied too heavily on powerful ceiling fixtures, and the lower level still felt dull. That mistake taught me to add wall lighting closer to eye level.
Color temperature also affects perceived height and comfort. Warm light can make a tall room feel more intimate, while neutral light often supports offices, galleries, and detailed tasks. Check glare by viewing each luminaire from standing and seated positions. Use maintained light levels, not only initial brightness, because dust and aging reduce performance. High-level installation requires safe access, proper load calculations, and compliance with local electrical codes. A qualified professional should verify wiring and emergency requirements. I still question whether perfect uniformity is desirable; controlled shadow can give a vast room more depth.
Tip 1: Match the fixture to the ceiling height and room purpose. In my installations, pendants work well above dining tables, while wide beam fixtures suit open floors. Tip 2: Use layered lighting. Combine ambient, task, and accent sources. Tip 3: Select high-output fixtures carefully. Excessive brightness can create glare on polished surfaces. Tip 4: Check beam angles before buying. Narrow beams highlight artwork, while wider beams spread light across seating areas.
Tip 5: Set pendant bottoms about 30 to 36 inches above a dining surface. For walkways, keep the lowest point at least 7 feet above the floor. Tip 6: In very tall rooms, avoid placing every fixture at one level. Staggered heights can reduce visual emptiness. Tip 7: Use adjustable stems or cables. They make future changes easier. Tip 8: Recessed fixtures need accurate spacing. A common starting point is half the ceiling height, but furniture should guide final positions.
Tip 9: Add wall sconces or uplights when the ceiling feels visually heavy. Light reflected from the ceiling softens the room. Tip 10: Install dimming controls where practical. Natural daylight changes throughout the day. I once specified fixtures too low in a stair hall, and the space felt crowded. That mistake changed my process. I now mock up mounting heights with temporary cords before final installation. Always verify local electrical requirements and use a qualified professional for permanent wiring.
Planning layered lighting for a high ceiling requires more than choosing powerful fixtures. Start with the room’s purpose, ceiling height, surface colors, and daylight direction. A bright white ceiling reflects light differently from exposed wood or dark concrete. Measure the space before selecting equipment.
Use three layers: ambient, task, and accent lighting. Ambient fixtures should spread light evenly without creating harsh pools on the floor. Suspended fixtures can bring illumination closer to seating areas, while recessed units support general brightness.
Task lighting belongs above kitchen islands, worktables, or reading chairs. Accent lighting can highlight beams, artwork, or textured walls.
Keep glare under control. Choose suitable beam angles and shield bright sources from direct eye contact. Dimmers help adjust the room from daytime work to evening relaxation. In a tall living room, I often test one fixture at night before installing several. The first attempt may look impressive but still leave dark corners. That mistake is useful. It shows where reflected light, not extra wattage, is needed.
Warm and neutral light can create different impressions. Use consistent color temperatures within connected areas. Light-colored walls may reduce the required output, while dark finishes absorb more light. A qualified electrician should confirm mounting points, load limits, and safe access for maintenance. High ceilings are difficult to revise later. Plan for cleaning and lamp replacement, too.
10 Tips for Lighting High Ceiling Spaces
Position lights before choosing their brightness. A high ceiling can hide poor aiming until glare reaches eye level. Keep fixtures away from direct sightlines near stairs, seating, and workstations. Use adjustable beams to place light on floors, shelves, and task surfaces. Layer ceiling, wall, and lower-level lighting for safer movement. Even illumination matters more than impressive height.
Choose wider beams for open areas and narrower beams for specific features. Space fixtures evenly, but check shadows beneath balconies and structural beams. Add controls that support dimming and separate lighting zones. This helps workers adjust light during cleaning, maintenance, or evening use. Select suitable color temperature and color rendering for the room’s function. Avoid excessive brightness near reflective floors or polished surfaces.
I once aimed several lights at a tall wall and created uncomfortable brightness below. The room looked dramatic, but people avoided that seating area. That mistake reminded me to test light from human eye level. Walk through the space at different times. Watch the glare. Check stairs from above and below. Keep maintenance access clear, and confirm that changing lamps will not require unsafe improvisation. A lighting plan may look perfect on paper, yet real shadows can disagree. Allow room for adjustment after installation.
High ceilings turn a simple relamping job into a planned maintenance operation. Access equipment, dust, heat, and control failures all affect performance. Begin with a lighting asset map. Record fixture locations, mounting heights, wattage, controls, and installation dates. Keep emergency routes clear. Schedule inspections during low-occupancy periods, using qualified personnel for elevated work.
The U.S. Energy Information Administration’s 2018 Commercial Buildings Energy Consumption Survey attributes 17% of commercial building electricity use to lighting. That makes cleaning and controls worth measuring, not guessing. Inspect lenses for dust, yellowing, cracks, and moisture marks. Use a calibrated light meter, then compare readings with the original design target. Check occupancy sensors, timers, dimming responses, and daylight controls from floor level. Small control errors can leave high-bay fixtures operating all night.
The U.S. Department of Energy reports that LED lighting uses at least 75% less energy and can last up to 25 times longer than incandescent lighting. Longer life does not mean maintenance-free. Inspect heat sinks, wiring, mounting hardware, and driver compartments for discoloration or loose connections. Log every failure, including location and operating hours. Keep compatible replacement parts available, but verify specifications before installation. Review dimming schedules after each inspection. One weakness remains. Teams often clean fixtures but ignore controls. Some readings will still be inconsistent, and that is useful evidence, not failure. A practical plan should change when the building proves it wrong.
Typical maintained illuminance targets for common high-ceiling environments. Use these reference levels to identify under-lit areas, plan cleaning, and schedule inspections before lighting performance declines.
Maintenance tips
The values shown are representative maintained illuminance levels commonly used for planning different indoor activities. Final requirements should be verified against the applicable lighting standard, task type, ceiling height, and visual conditions.
Consider room use, ceiling height, surface colors, and daylight direction. Measure the space first. Dark concrete absorbs more light than a white ceiling.
Ambient lighting provides general brightness. Task lighting supports islands, desks, and reading chairs. Accent lighting highlights beams, artwork, or textured walls.
Suspended fixtures bring light closer to seating or work areas. They can reduce floor shadows. Their height still needs careful adjustment.
Select suitable beam angles and shield bright sources from direct eye contact. Dimmers help control brightness. Glare is easy to underestimate.
Use consistent color temperatures in connected areas. Warm light can feel relaxed. Neutral light may support work. Mixing them carelessly can look uncomfortable.
Test one fixture at night before installing several. Check corners, seating areas, and reflected light. The first layout may look impressive but still fail.
Create an asset map with fixture locations, mounting heights, wattage, controls, and installation dates. Record failures, operating hours, and replacement parts. Keep it current.
Inspect lenses for dust, yellowing, cracks, and moisture marks. Check heat sinks, wiring, mounting hardware, and control responses. Use a calibrated light meter when possible.
No. Long service life does not prevent dust, heat, loose connections, or control failures. High ceilings still require planned access and safe inspections.
Do not clean fixtures while ignoring controls. Sensors, timers, and dimming systems may keep lights operating unnecessarily. Some inconsistent readings are useful evidence. A plan can be wrong.
Lighting for High Ceiling Spaces requires careful planning to create a comfortable, functional, and visually balanced environment. The process begins by assessing the room’s size, purpose, ceiling height, natural light, and surface finishes. Suitable fixture types may include suspended lights, high-output ceiling fixtures, wall-mounted lighting, and adjustable spotlights, with mounting heights selected to provide effective coverage without creating glare or obstructing activity. A layered approach that combines ambient, task, and accent lighting can help distribute illumination evenly while adding depth and character.
Light positioning should support safety, visibility, and visual comfort by reducing harsh shadows and bright contrasts in important areas such as walkways, work surfaces, and gathering zones. Controls such as dimmers, timers, and sensors can improve flexibility and energy efficiency. Because high fixtures can be difficult to access, maintenance should be considered from the beginning. Choosing durable equipment, scheduling regular inspections, cleaning surfaces, and replacing components safely will help maintain consistent performance over time.
Cool Light